Upload a file using Tiger Console
Upload CSV, Parquet, and text files into your Tiger Cloud service using Tiger Console. Drag and drop from your local machine, or provide a path to the file in S3
Early access
You can upload files into your service using Tiger Console. This page explains how to upload CSV, Parquet, and text files, from your local machine and from an S3 bucket.
Tiger Console enables you to drag and drop files to upload from your local machine.
Prerequisites
Section titled “Prerequisites”To follow the steps on this page:
- Create a target Tiger Cloud service with the Real-time analytics capability.
This feature is currently not supported for Tiger Cloud on Microsoft Azure.
To upload a CSV file to your service:
- Select your service in Console, then click
Actions>Import data>Upload your files>Upload CSV file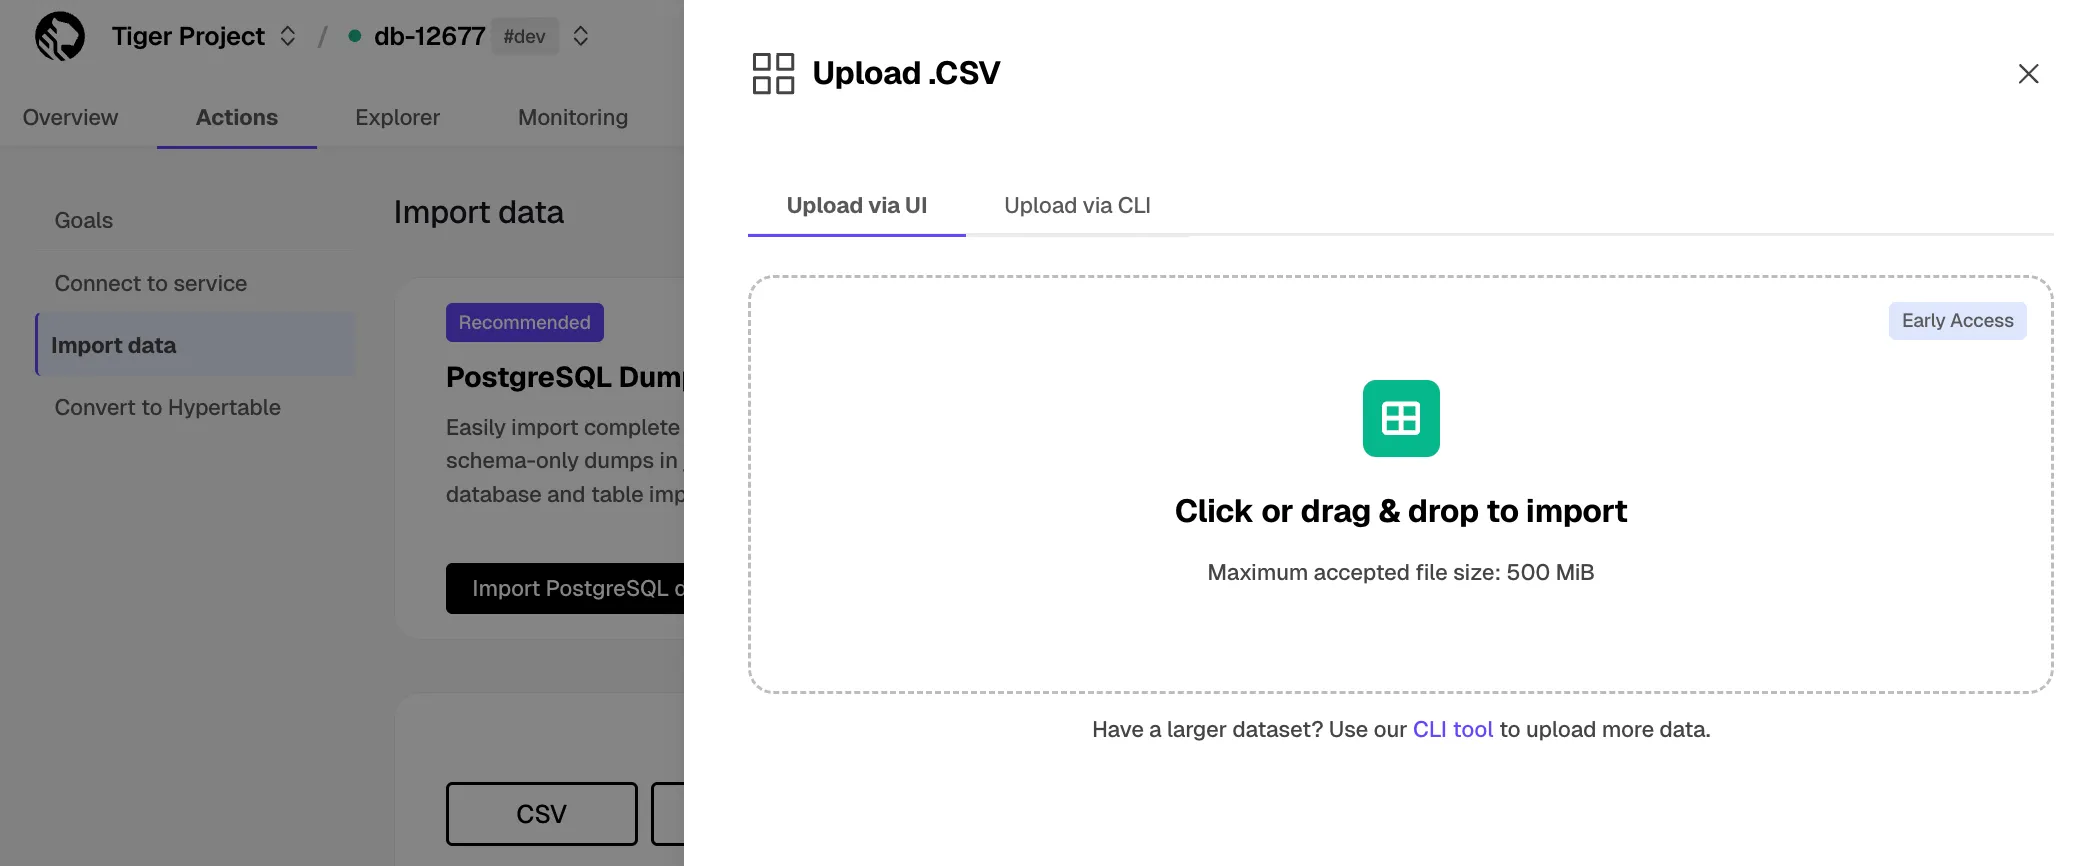
- Click to browse, or drag the file to import
- Configure the import
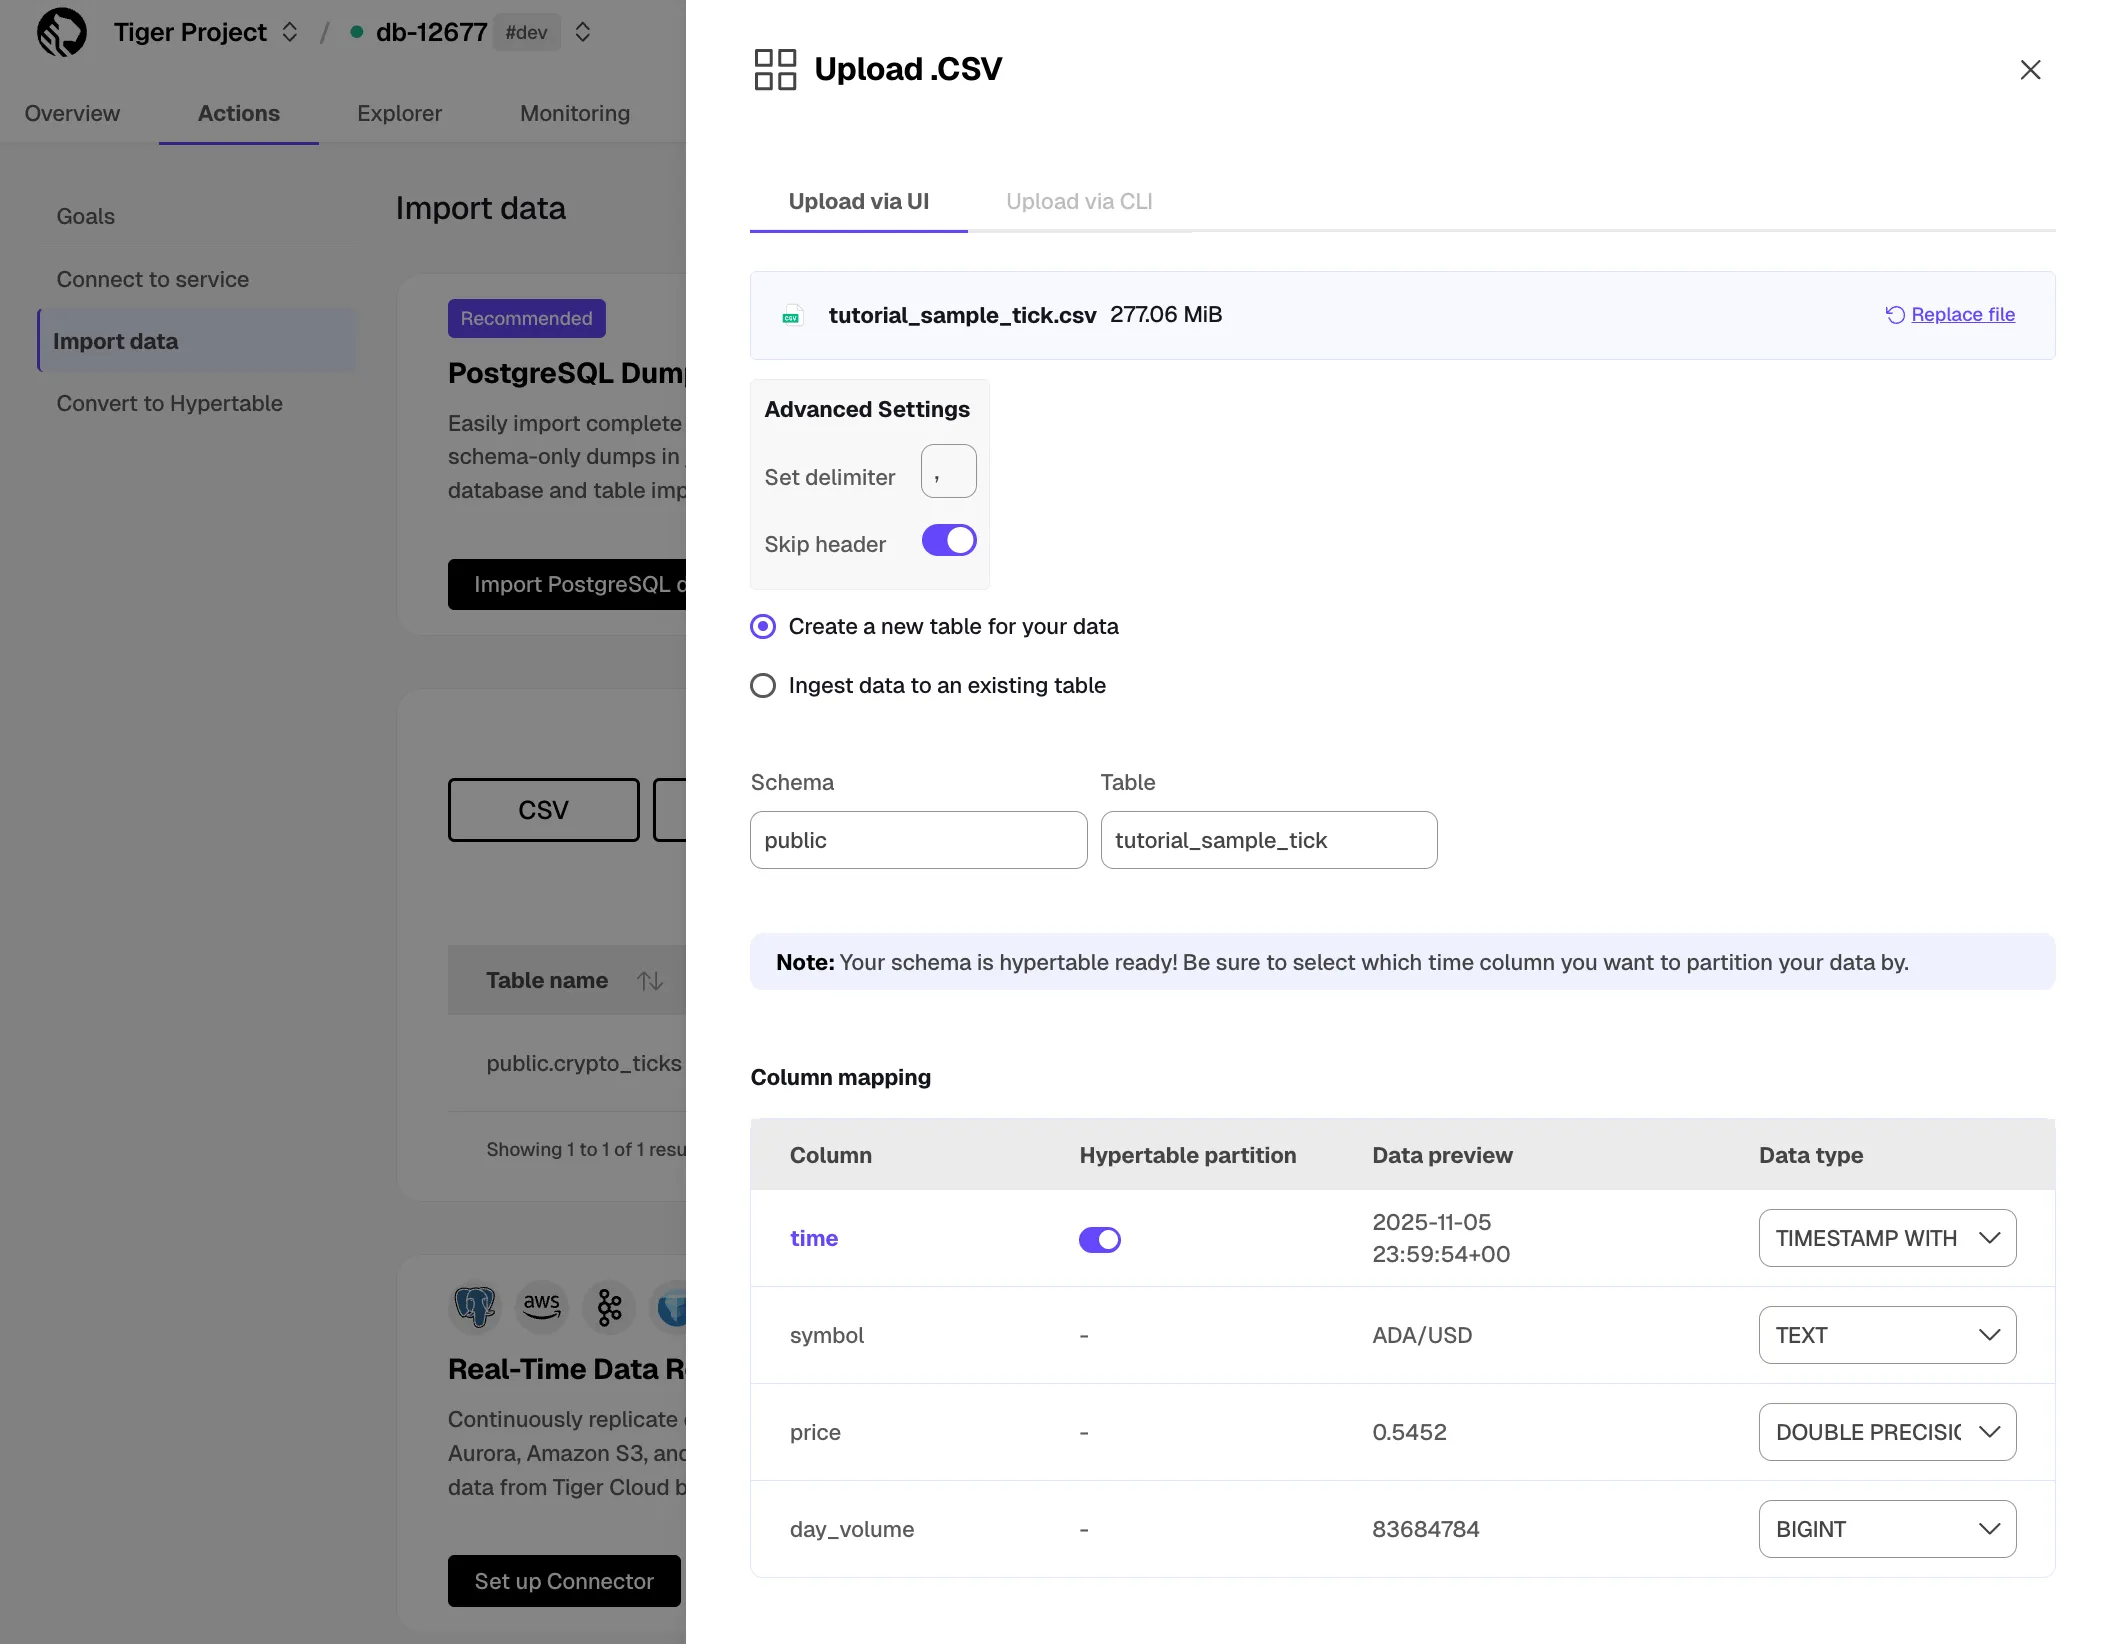
- Set a delimiter.
- Toggle to skip or keep the header.
- Select to ingest the data into an existing table or create a new one.
- Provide the new or existing table name.
- (Optional) For a new table with a time column, toggle the time column to create a hypertable instead of a regular table.
- Click
Process CSV fileWhen the processing is completed, to find the data your imported, click
Explorer.
To upload a Parquet file to your service:
- Select your service in Console, then click
Actions>Import data>Upload your files>Upload Parquet file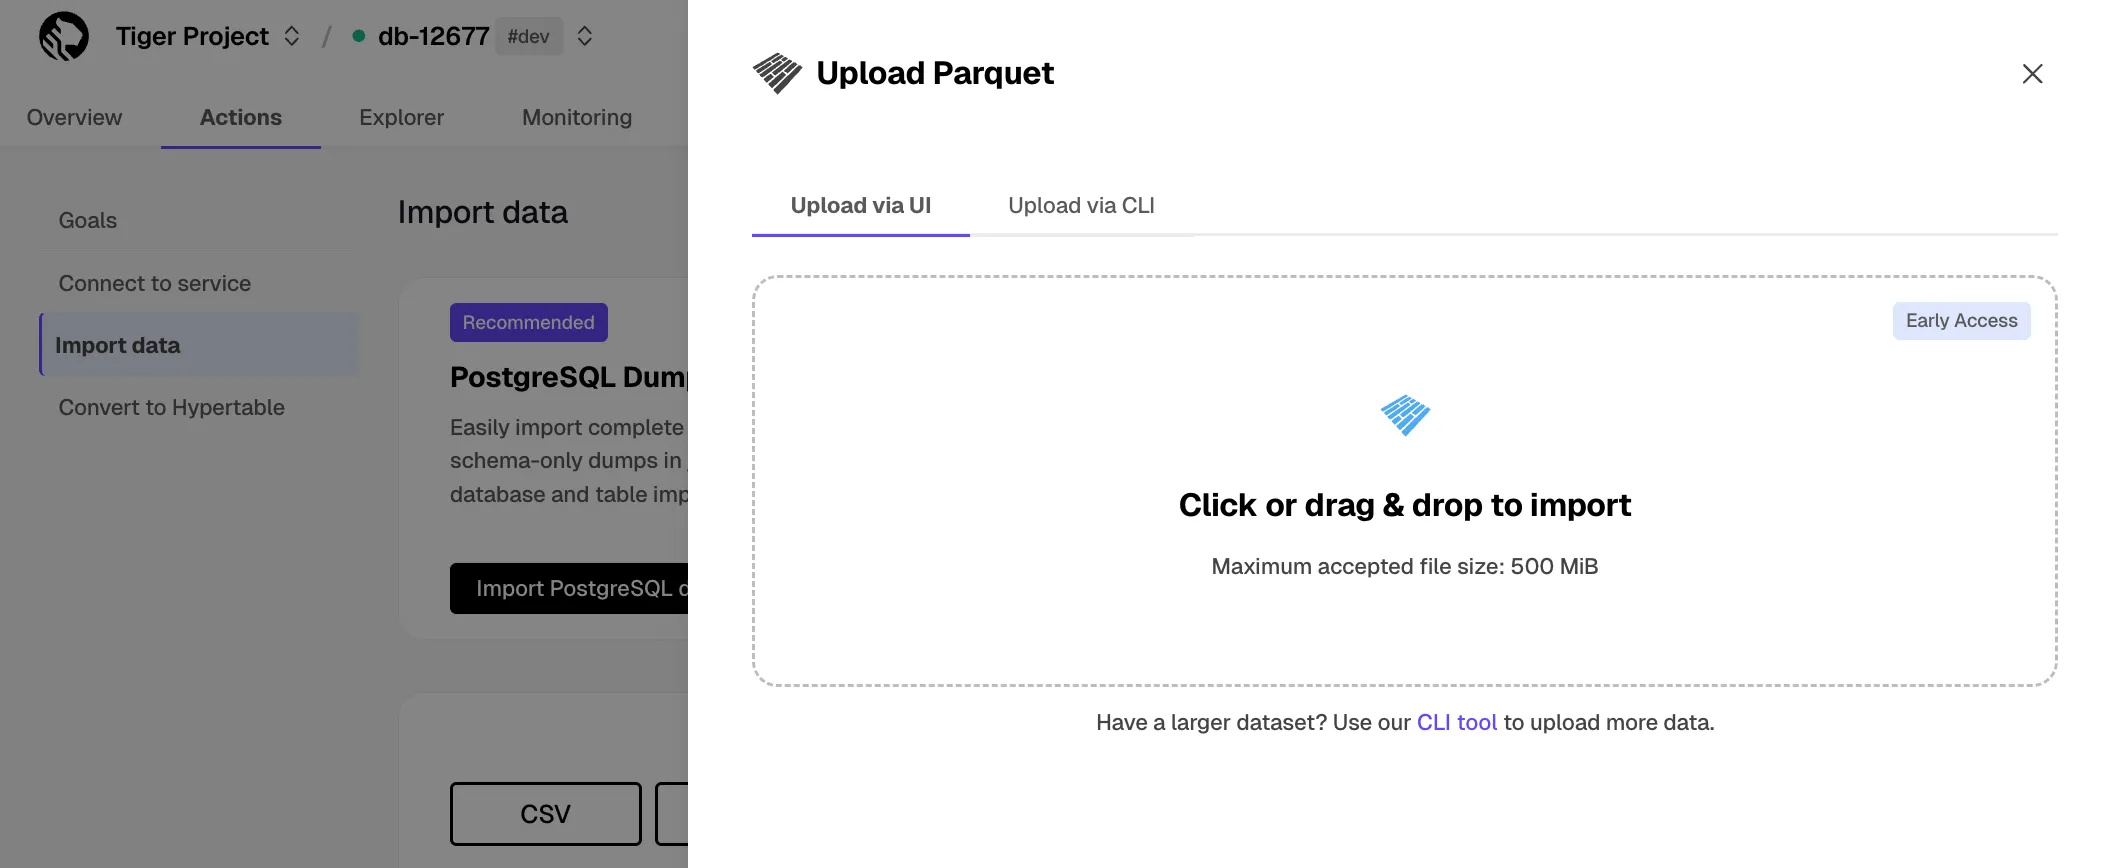
- Click to browse, or drag the file to import
- Configure the import
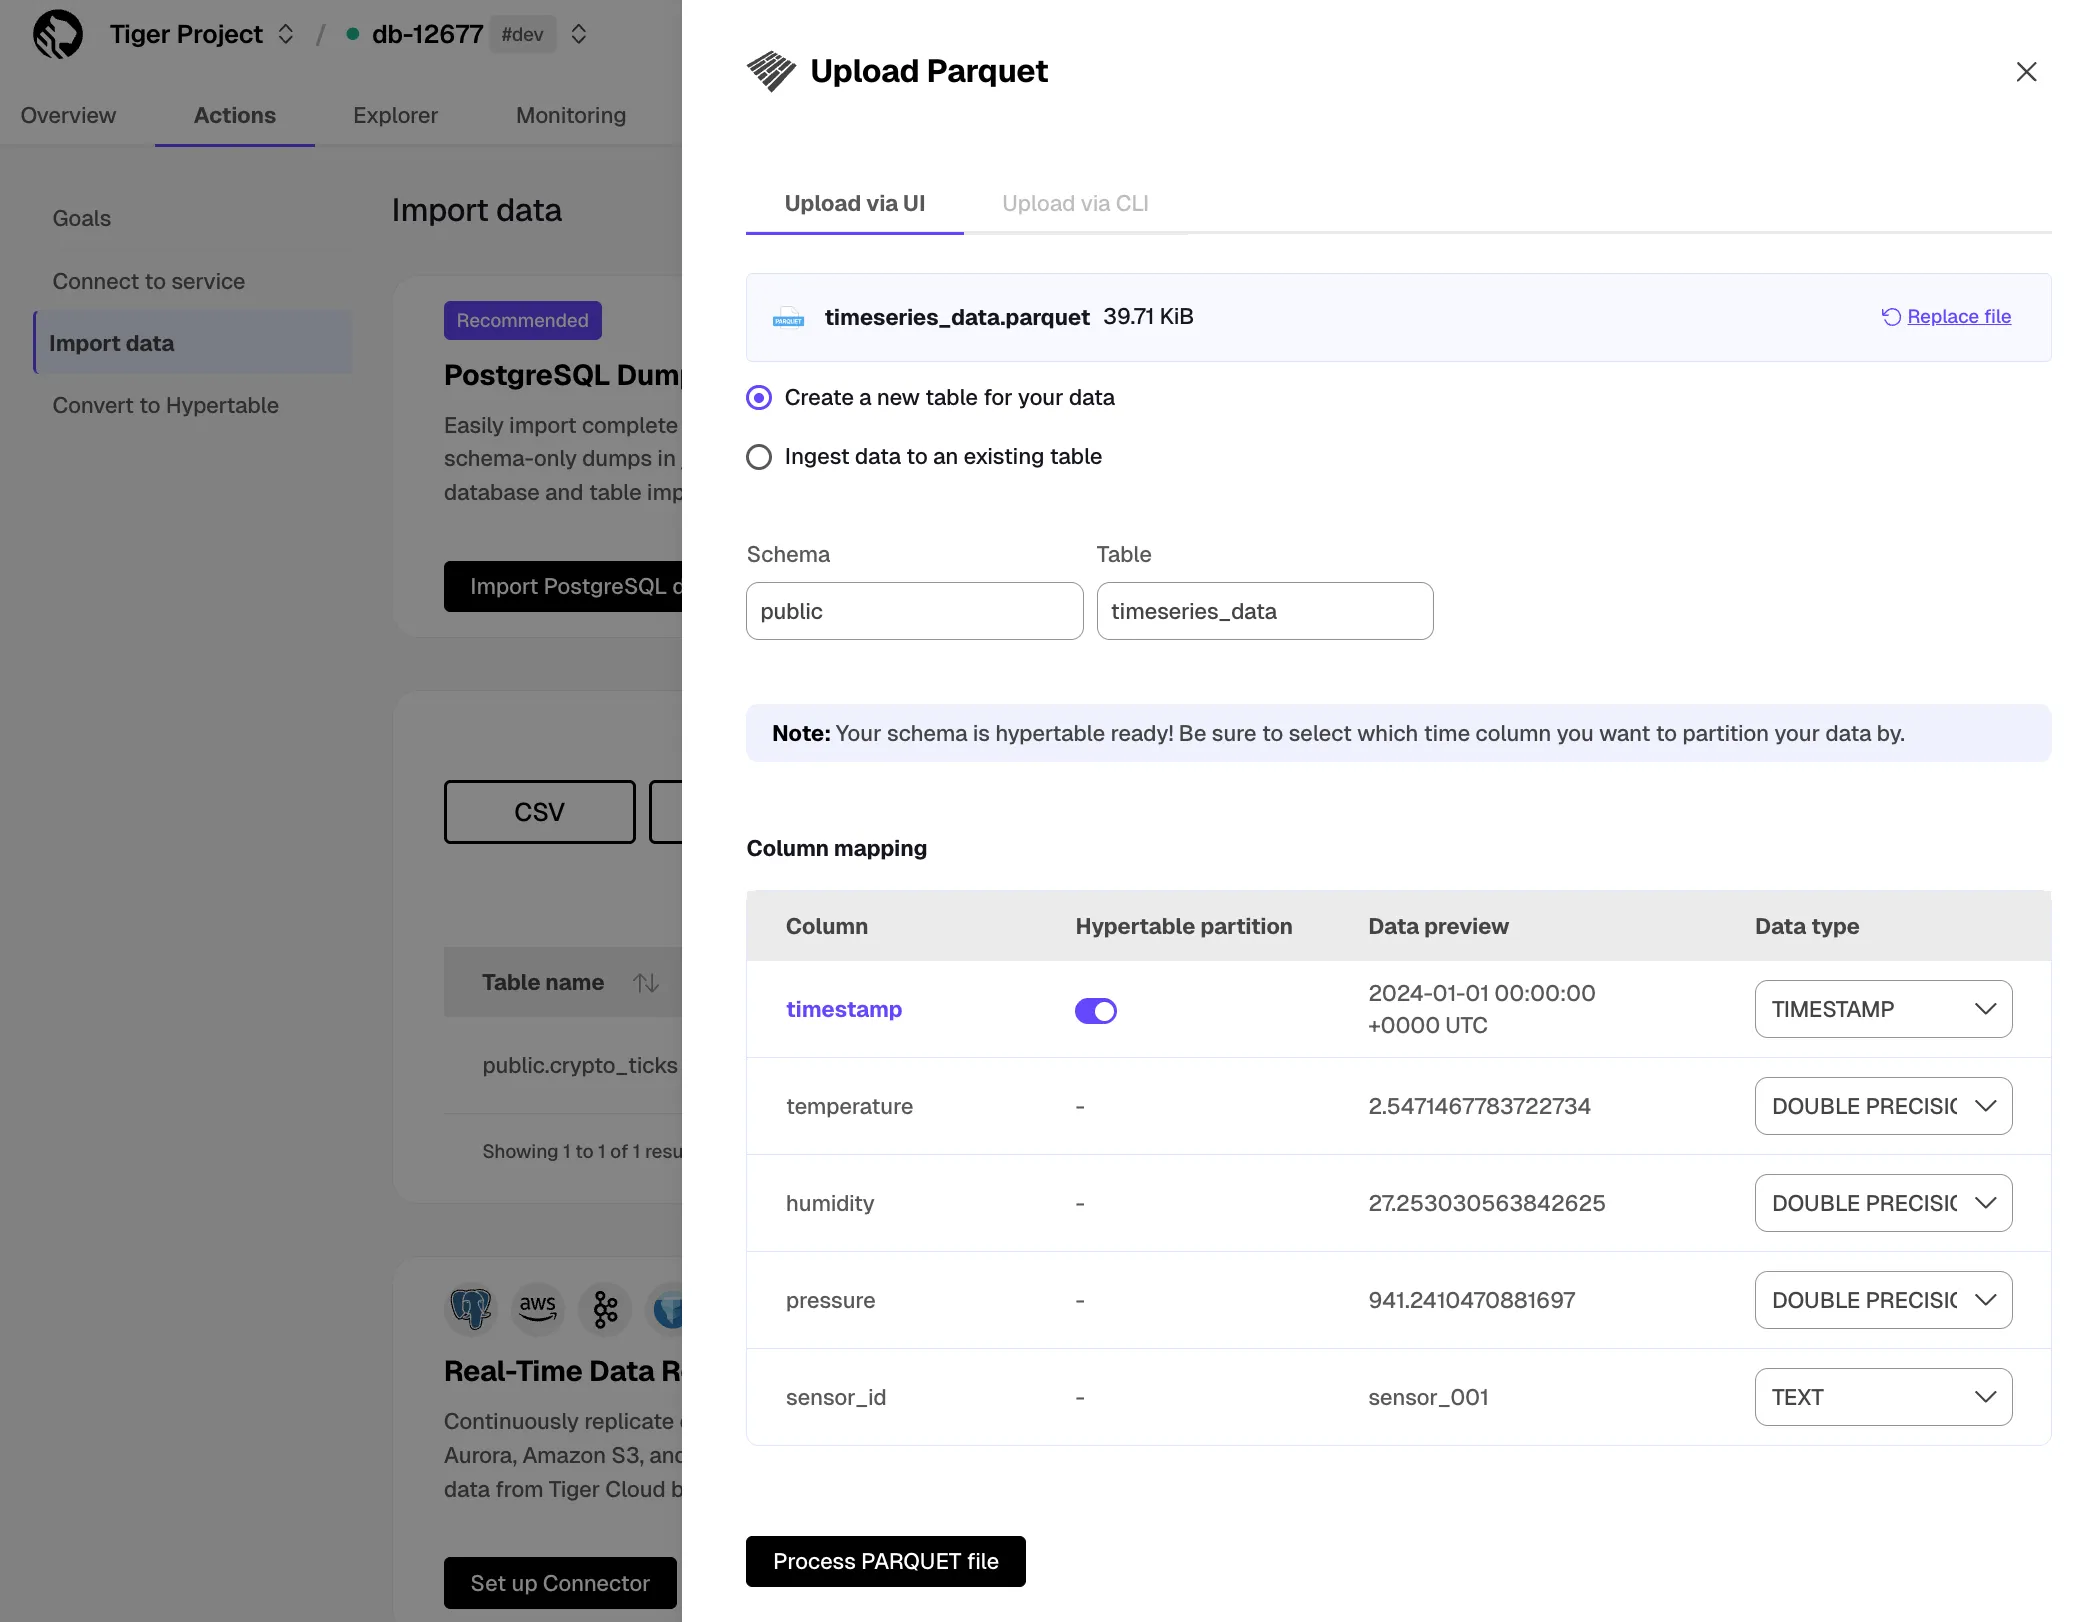
- Select to ingest the data into an existing table or create a new one.
- Provide the new or existing table name.
- (Optional) For a new table with a time column, toggle the time column to create a hypertable instead of a regular table.
- Click
Process Parquet fileWhen the processing is completed, to find the data your imported, click
Explorer.
To upload a TXT or MD file to your service:
- Select your service in Console, then click
Actions>Import data>Upload your files>Upload Text file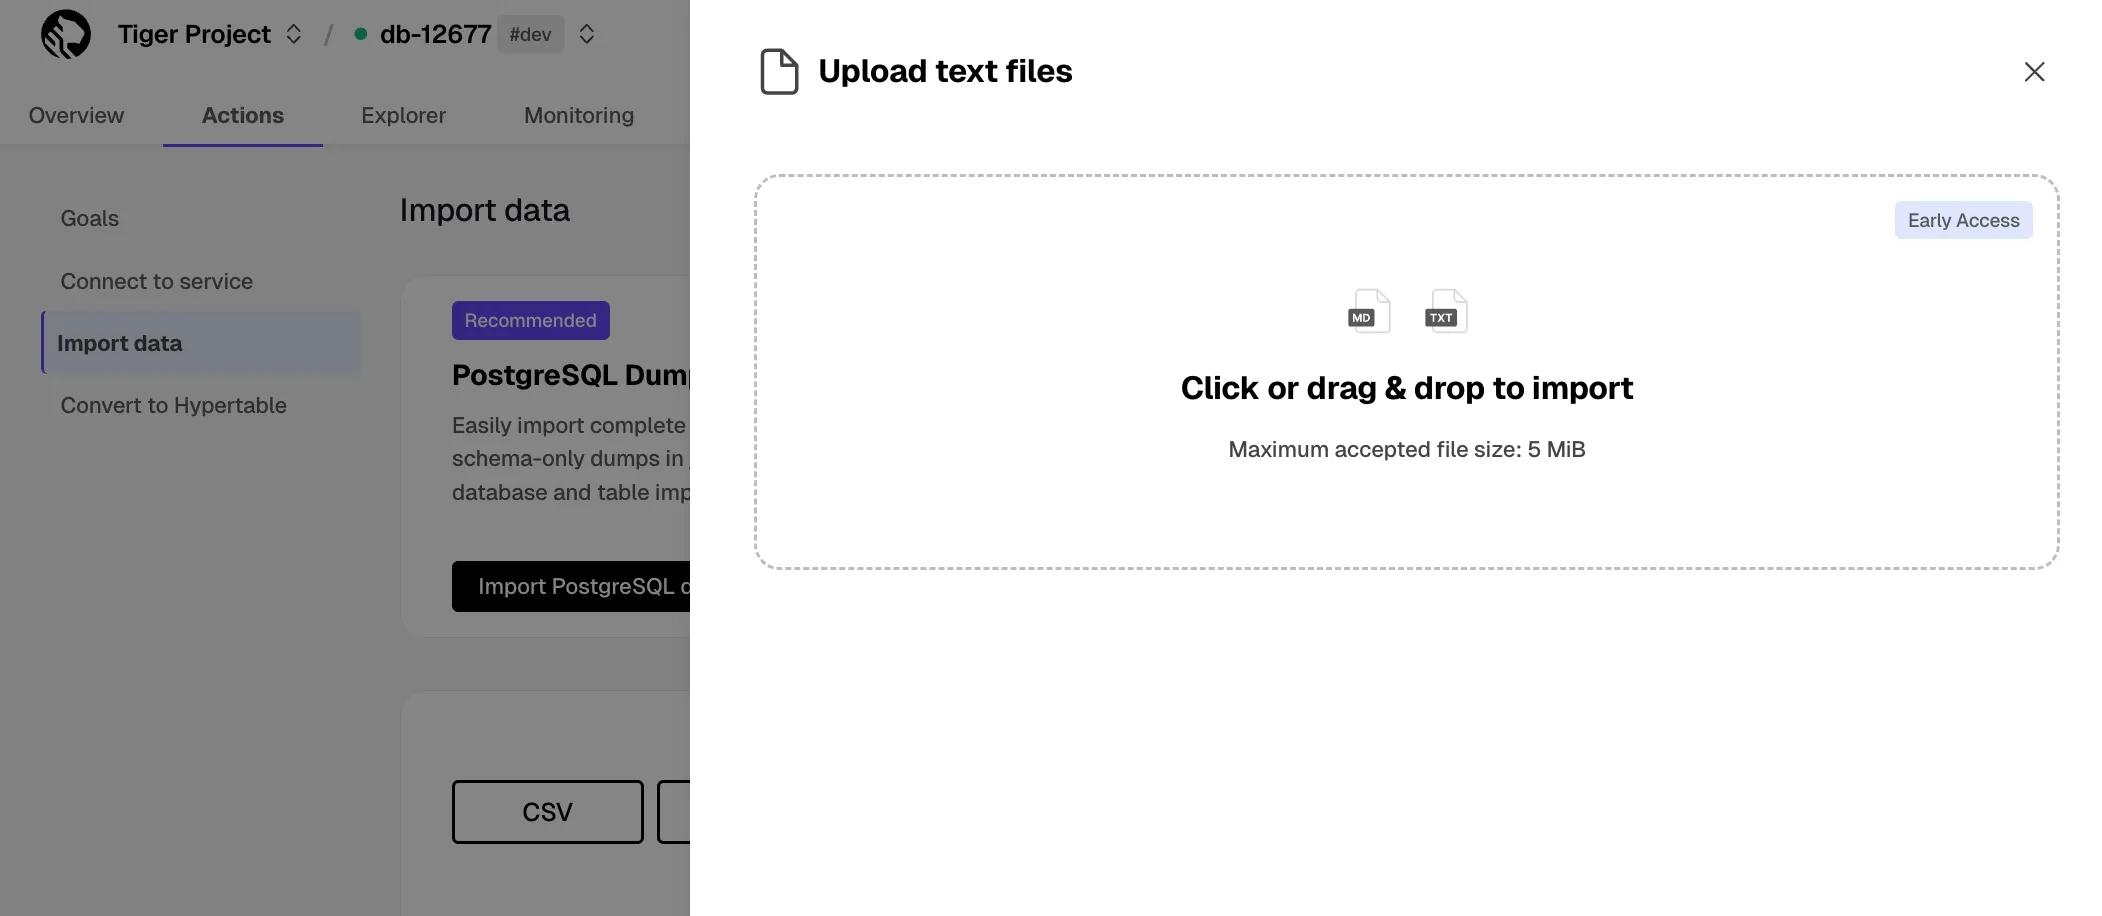
- Click to browse, or drag and drop the file to import
- Configure the import
Provide a name to create a new table, or select an existing table to add data to.
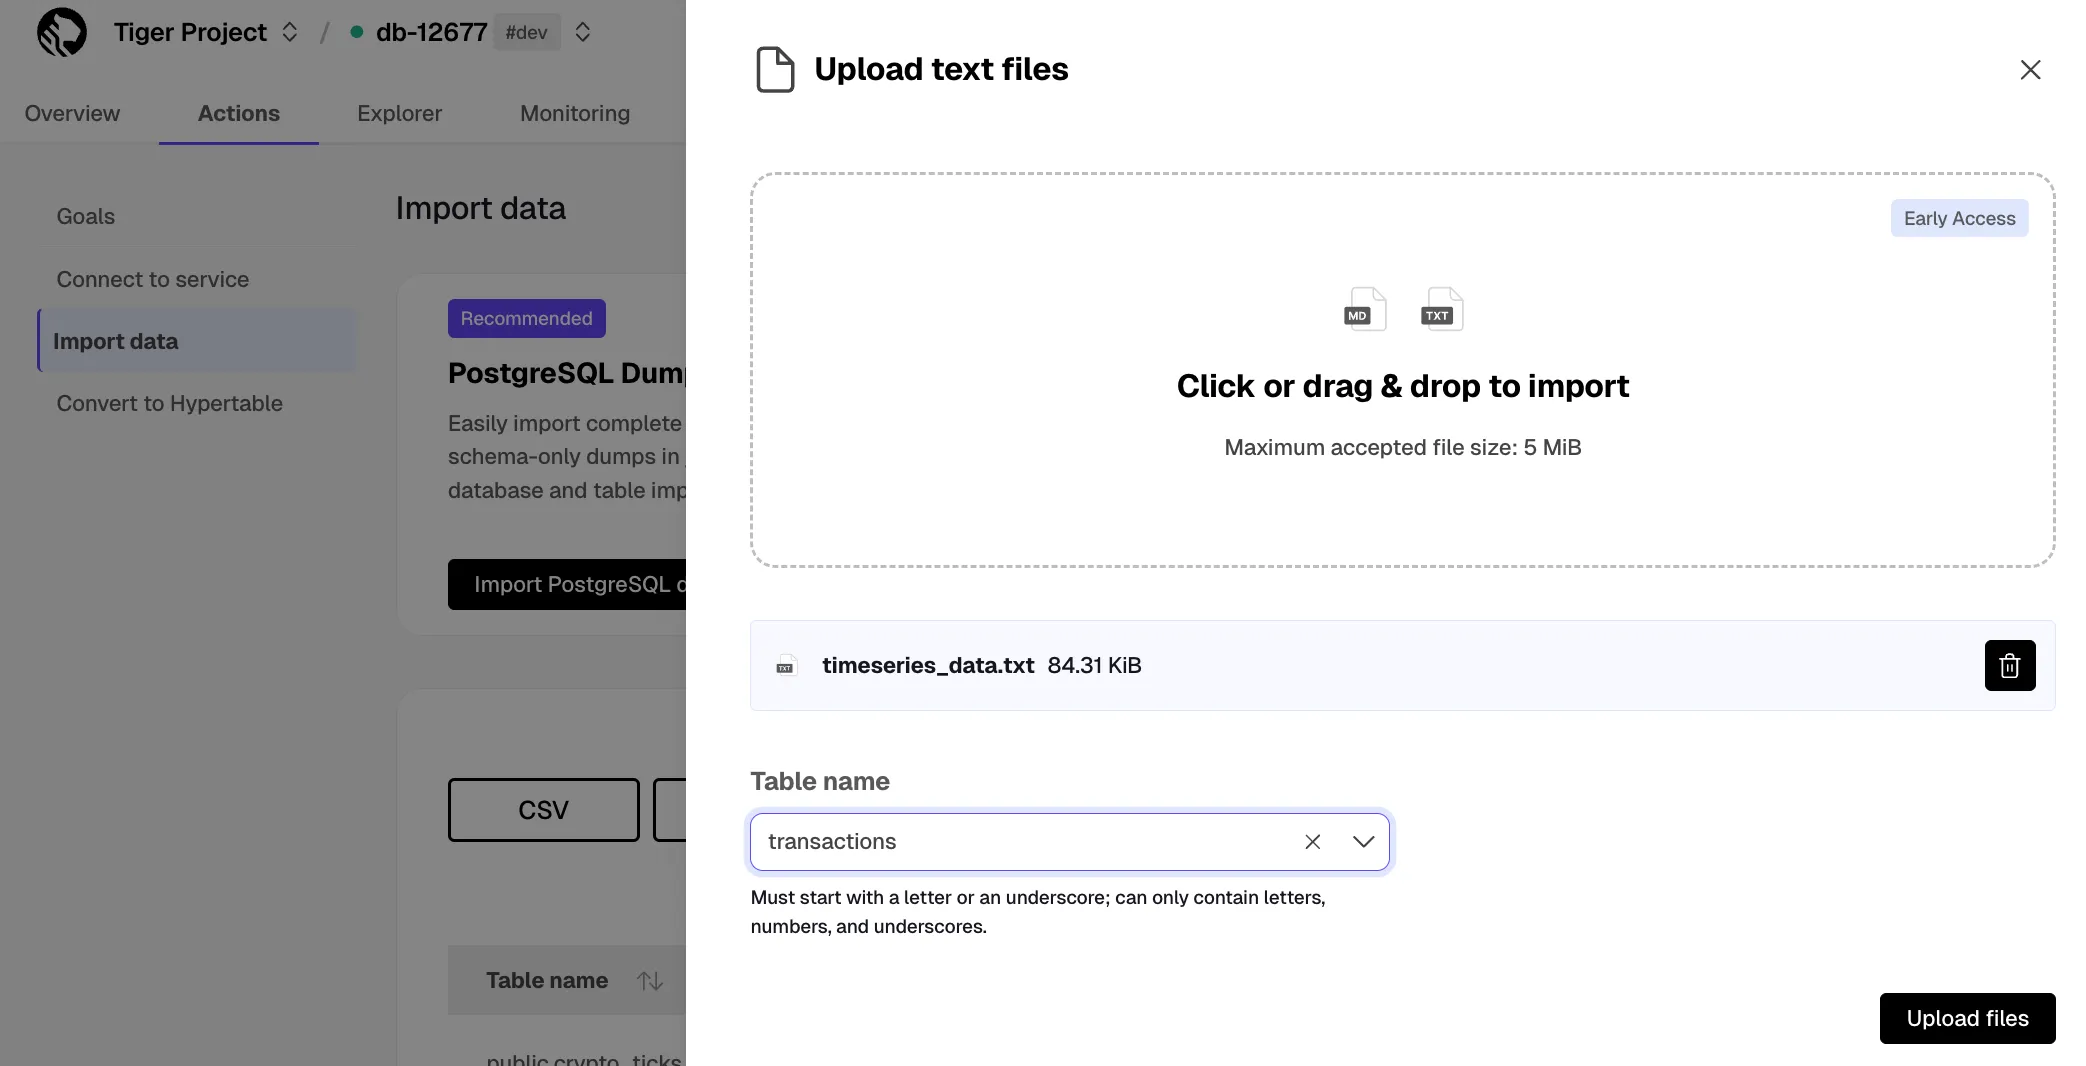
- Click
Upload filesWhen the upload is finished, find your data imported to a new or existing table in
Explorer.
Tiger Console enables you to upload CSV and Parquet files, including archives compressed using GZIP and ZIP, by connecting to an S3 bucket.
Prerequisites
Section titled “Prerequisites”To follow the steps on this page:
- Create a target Tiger Cloud service with the Real-time analytics capability.
- Ensure access to a standard Amazon S3 bucket containing your data files.
- Configure access credentials for the S3 bucket. The following credentials are supported:
This feature is currently not supported for Tiger Cloud on Microsoft Azure.
To import a CSV file from an S3 bucket:
- Select your service in Console, then click
Actions>Import data>Explore import options>Import from S3 - Select your file in the S3 bucket

- Provide your file path.
- Select
CSVin the file type dropdown. - Select the authentication method:
IAM roleand provide the role.Public.
- Click
Continue.
- Configure the import
- Set a delimiter.
- Toggle to skip or keep the header.
- Select to ingest the data into an existing table or create a new one.
- Provide the new or existing table name.
- (Optional) For a new table with a time column, toggle the time column to create a hypertable instead of a regular table.
- Click
Process CSV fileWhen the processing is completed, to find the data your imported, click
Explorer.
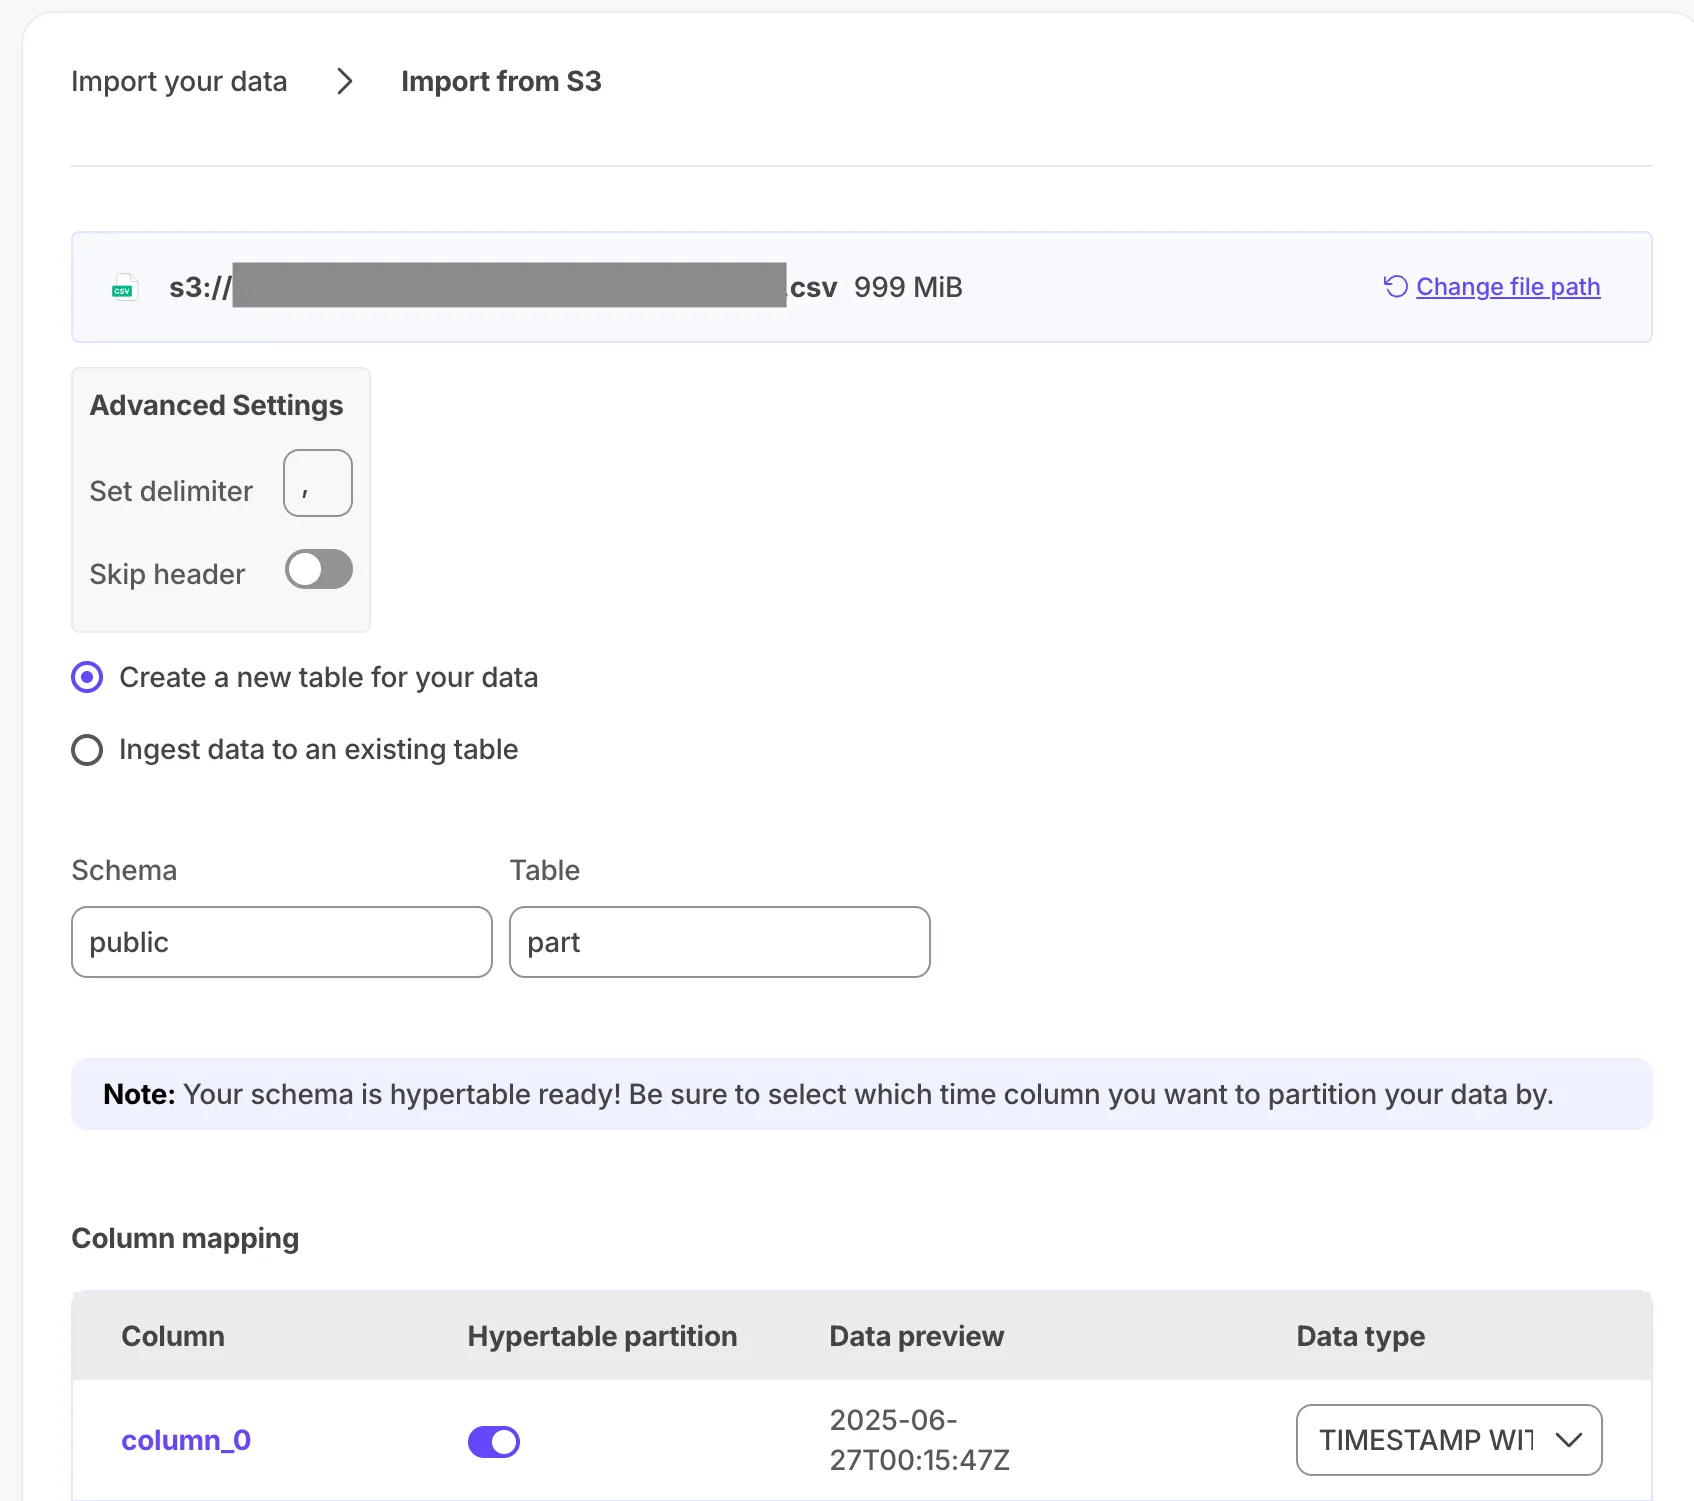
To import a Parquet file from an S3 bucket:
- Select your service in Console, then click
Actions>Import from S3 - Select your file in the S3 bucket
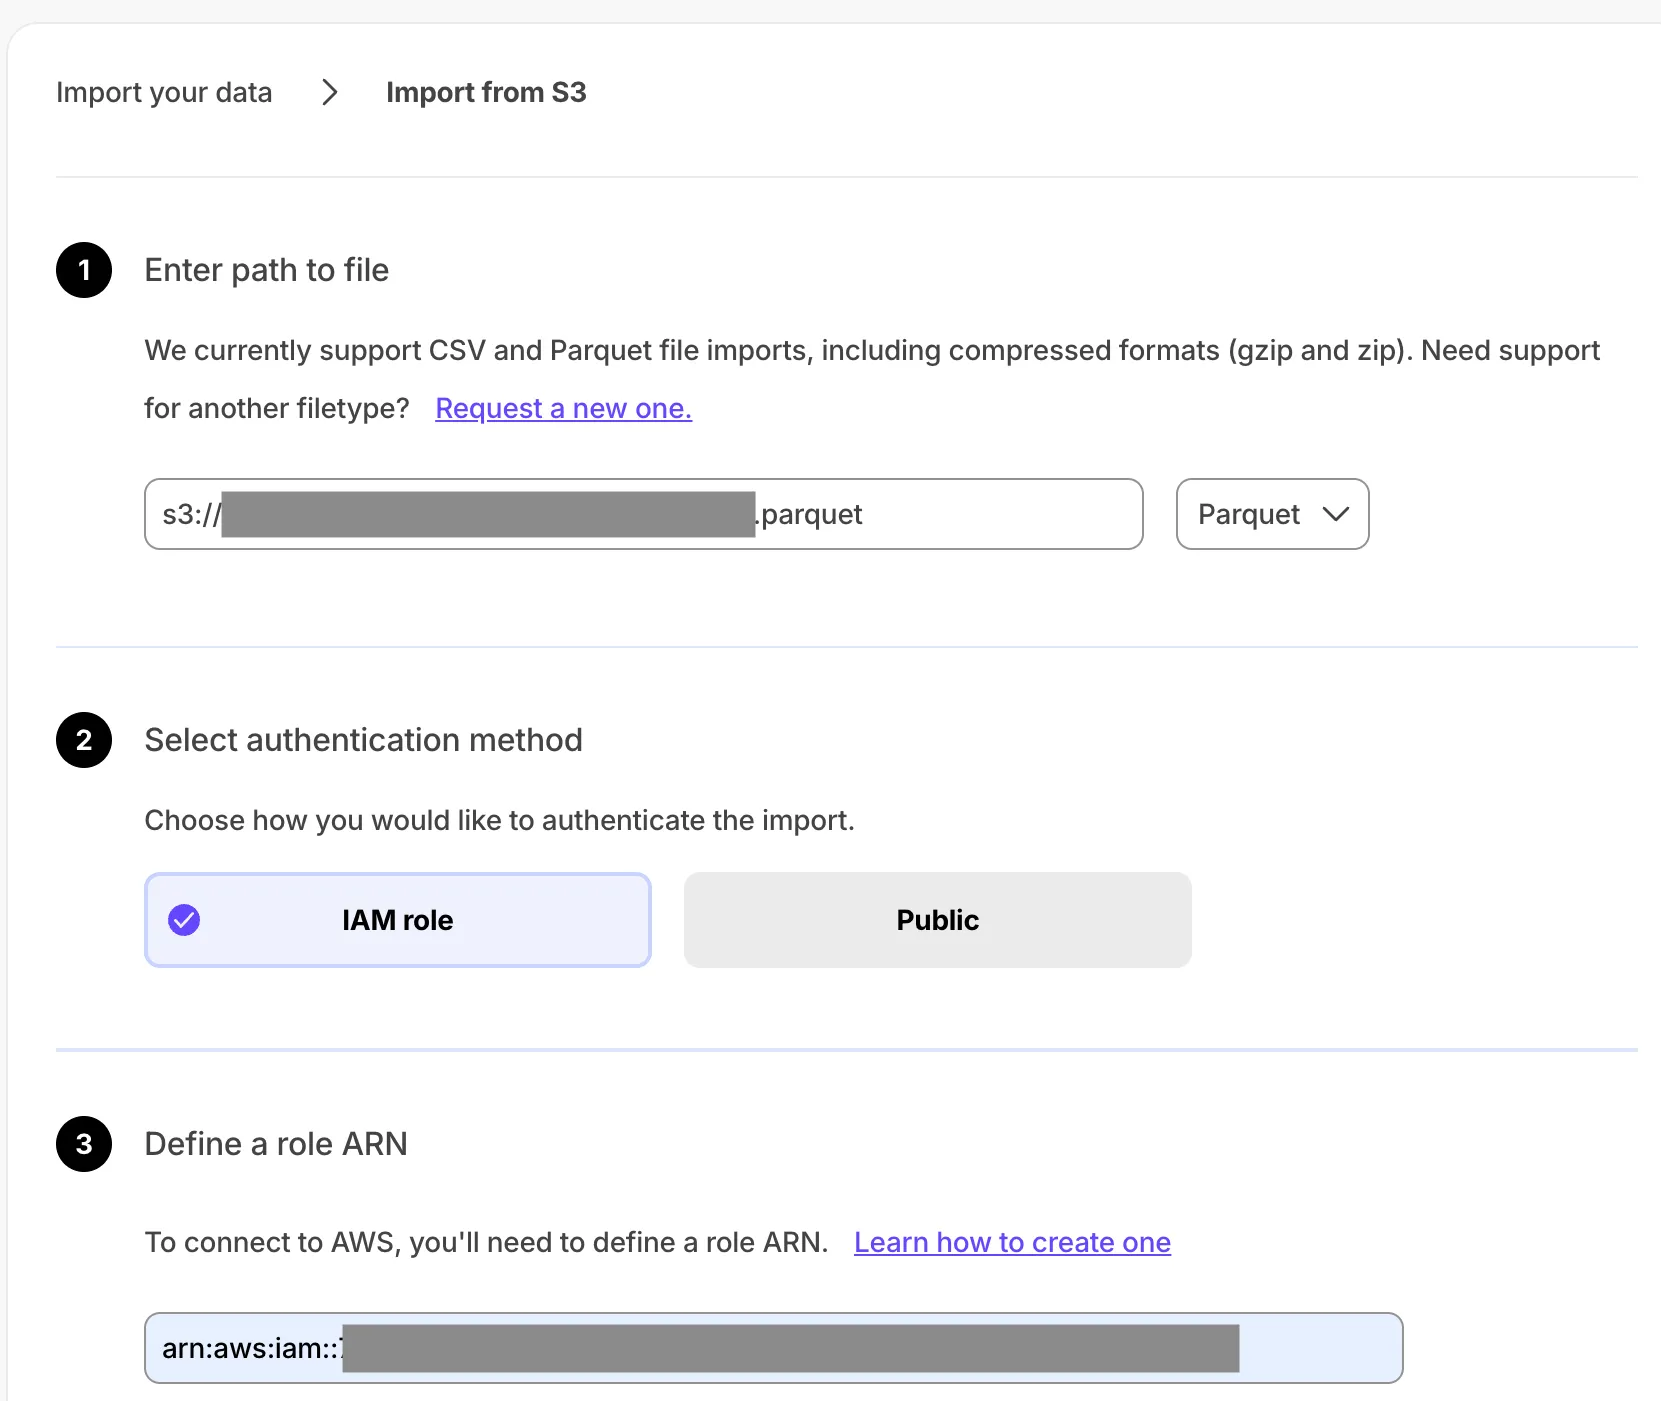
- Provide your file path.
- Select
Parquetin the file type dropdown. - Select the authentication method:
IAM roleand provide the role.Public.
- Click
Continue.
- Configure the import
- Select
Create a new table for your dataorIngest data to an existing table. - Provide the new or existing table name.
- (Optional) For a new table with a time column, toggle the time column to create a hypertable instead of a regular table.
- Select
- Click
Process Parquet fileWhen the processing is completed, to find the data your imported, click
Explorer.
And that is it, you have imported your data to your Tiger Cloud service.
Troubleshooting
Section titled “Troubleshooting”- Upload fails or times out: Use a smaller file or split the data. For large or automated loads, use import via terminal.
- Column mapping errors: Ensure headers match the expected table columns, including case.
- Data type or null errors: Check that values fit the column types and that NOT NULL columns have no empty values, or adjust null handling in the import settings.
- Encoding issues: Save the file as UTF-8 to avoid corrupted characters.
Related
Section titled “Related”- Upload a file using the terminal: Use
psql,COPY, orpg_restorefor large or automated imports. - Sync from S3: Continuously sync CSV and Parquet from an S3 bucket.
- Sync data from PostgreSQL: Continuously replicate from a PostgreSQL database.
- Live import from a database: Migrate with minimal or no downtime.
- Migrate overview: All import and migration options.