IP allow list
Restrict access to your services with IP address allow lists
You can restrict access to your Tiger Cloud services to trusted IP addresses only. This prevents unauthorized connections without the need for a Virtual Private Cloud. Creating IP allow lists helps comply with security standards such as SOC 2 or HIPAA that require IP filtering. This is especially useful in regulated industries like finance, healthcare, and government.
For a more fine-grained control, you create separate IP allow lists for service and data management.
Create and attach an IP allow list for service management
You create an IP allow list at the project level, then attach your service to it.
- In Tiger Console, select
Security>IP Allow List, then clickCreate IP Allow List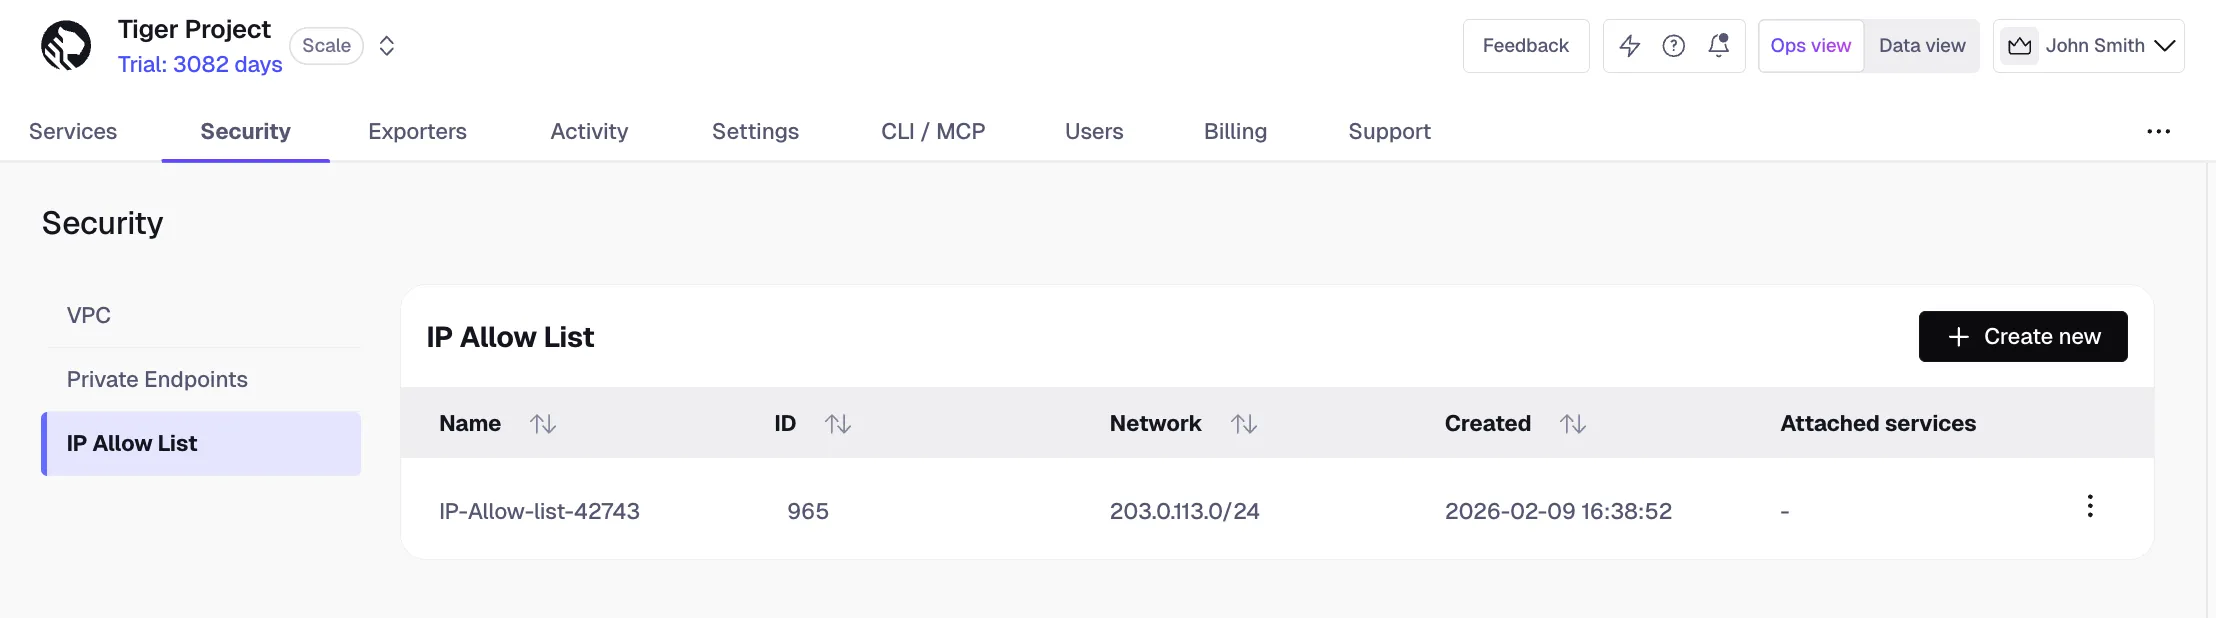
- Enter your trusted IP addresses
The number of IP addresses that you can include in one list depends on your pricing plan.
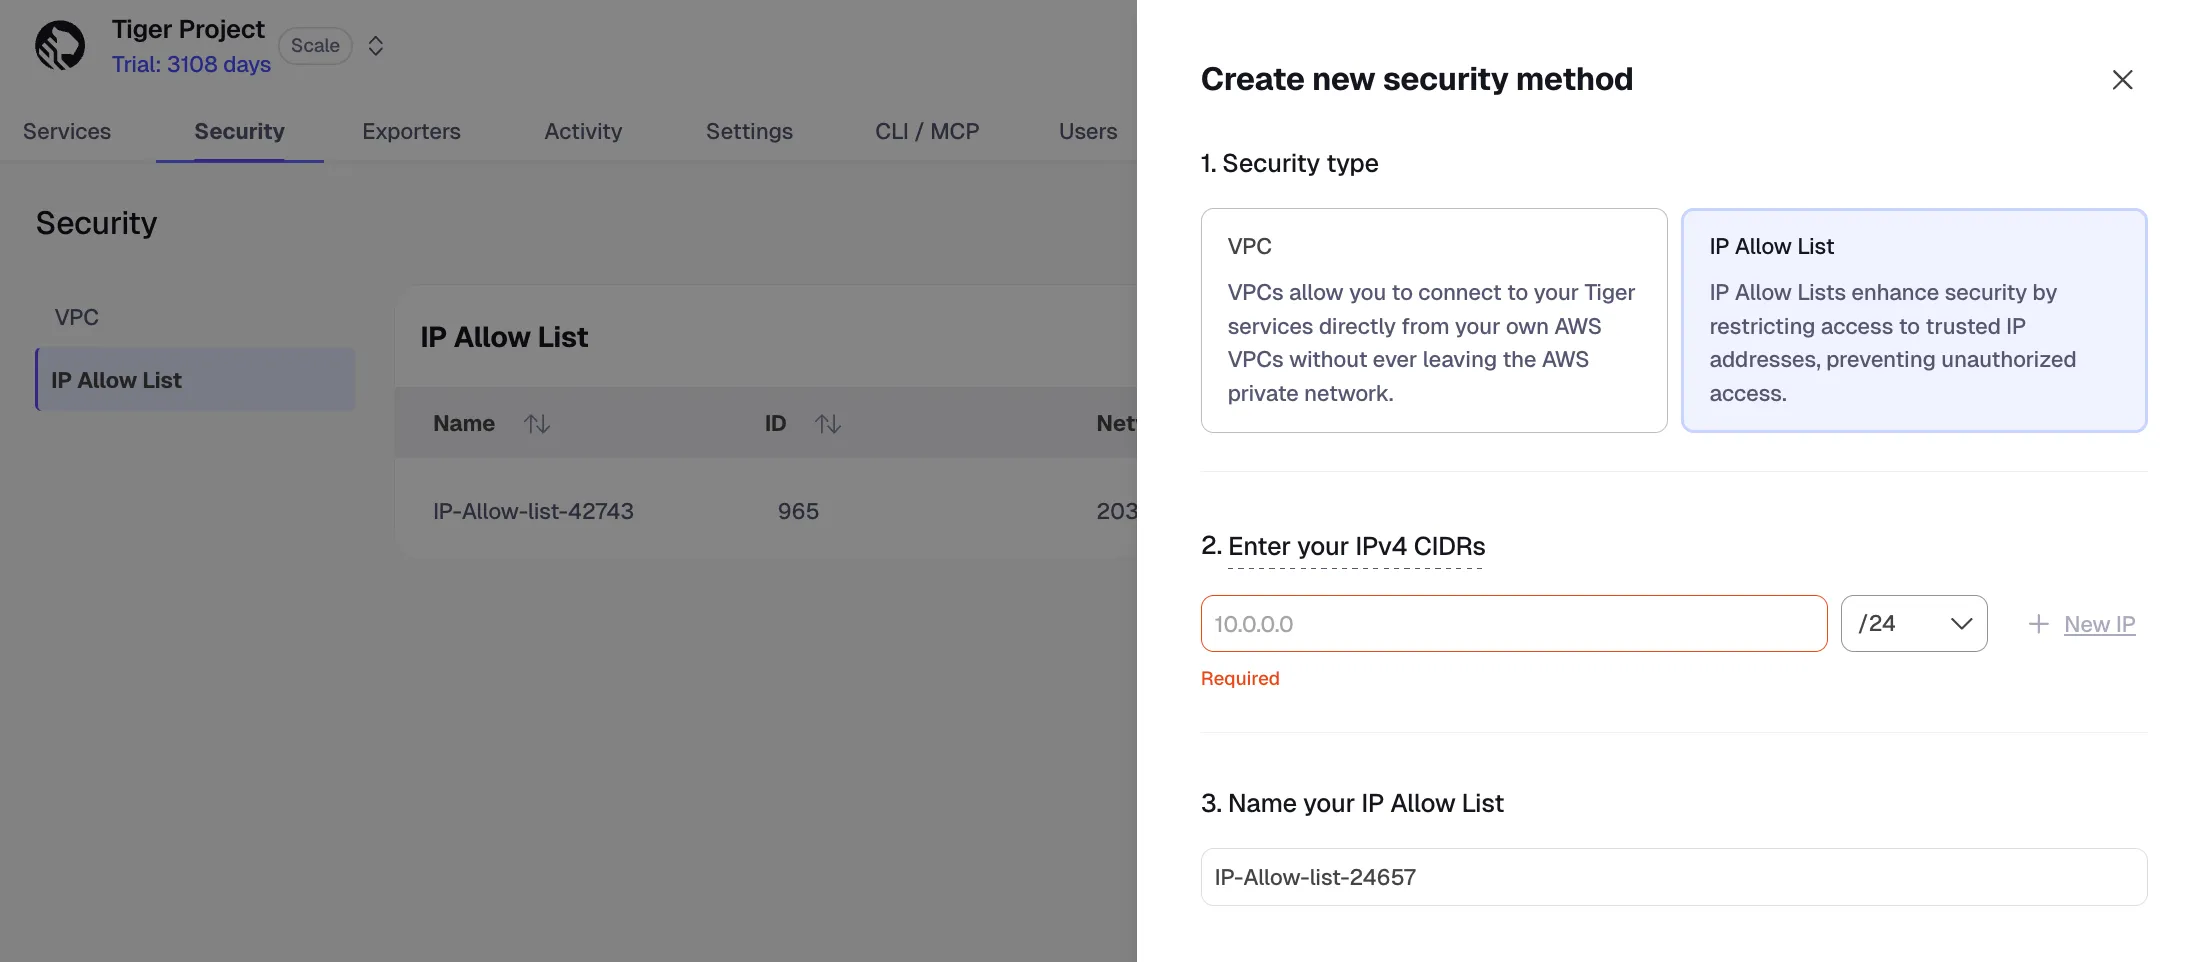
- Name your allow list and click
Create IP Allow ListClick
+ Create IP Allow Listto create another list. The number of IP allow lists you can create depends on your pricing plan. - Select a Tiger Cloud service, then click
Operations>Security>IP Allow List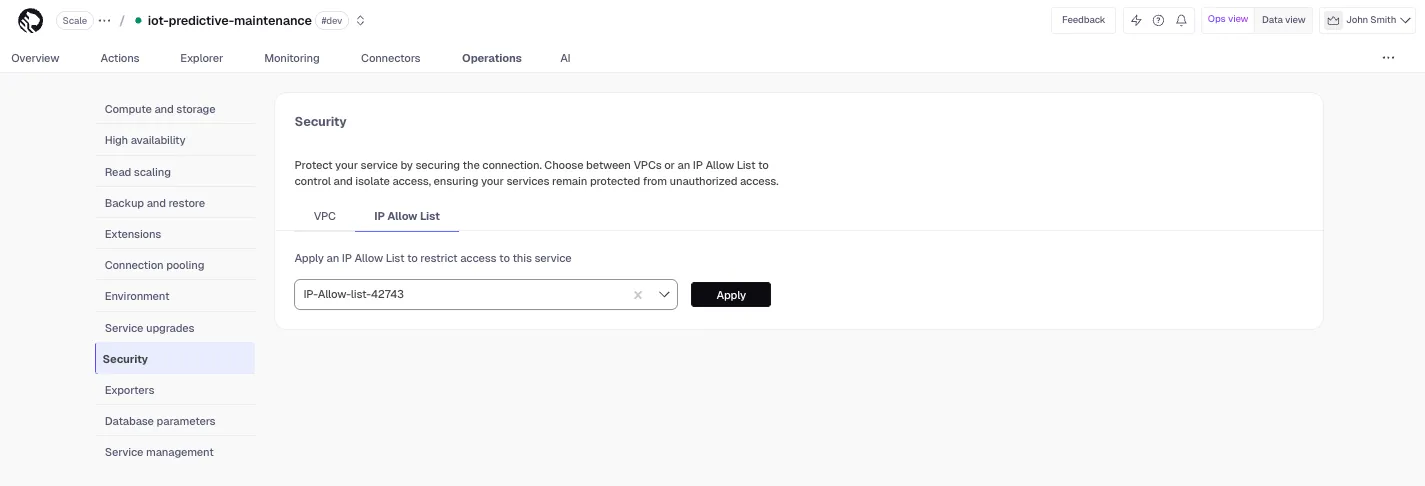
- Select the list in the drop-down and click
Apply - Type
Applyin the confirmation popup
You have created and attached an IP allow list for service management operations. You can unattach or change the list attached to a service from the same tab.
Create an IP allow list for querying your data
You create an IP allow list in the Data view settings.
- In Tiger Console, toggle
Data viewat the top right - Click the cog icon to open
Preferences>Settings - Log into PopSQL
- Scroll down and toggle
IP Allowlist - Add IP addresses
- Click
Add entry. - Enter an IP address or a range of IP addresses.
- Click
Add. - When all the IP addresses have been added, click
Apply. - Click
Confirm.
- Click
You have successfully added an IP allow list for querying your service in Data view.